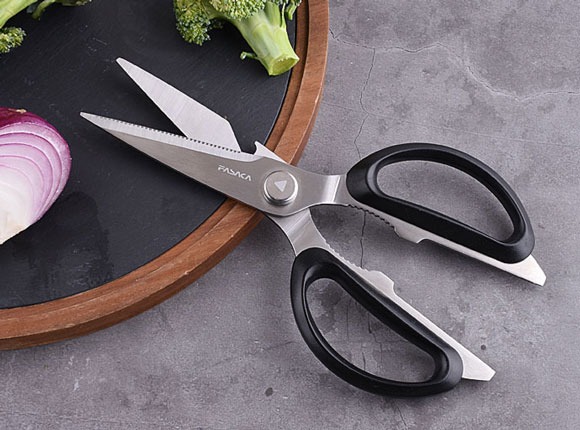



How to Sharpen Kitchen Shears: A Complete Step-by-Step Guide
How to Sharpen Kitchen Shears: A Complete Step-by-Step Guide
Published by FASAKA | Kitchen Shears Maintenance Guide
Kitchen shears are among the most frequently used tools in both home and professional kitchens. From trimming poultry and cutting herbs to opening food packaging and preparing seafood, kitchen shears handle countless daily tasks.
However, like any cutting tool, kitchen shears gradually lose their sharpness over time. Dull blades can make food preparation more difficult, increase hand fatigue, and even create safety risks during use.
The good news is that most kitchen shears can be sharpened and restored to near-original performance with the right techniques and tools.
In this guide, you'll learn how to sharpen kitchen shears safely and effectively, discover the best sharpening methods, and learn how to keep your kitchen scissors performing at their best for years to come.

Why Kitchen Shears Become Dull
Every time kitchen shears cut through food, packaging, herbs, poultry, or seafood, microscopic amounts of metal wear away from the blade edge.
Over hundreds or thousands of cutting cycles, this wear gradually rounds off the cutting edge, reducing sharpness and cutting efficiency.
Several factors can accelerate blade dulling:
- Frequent use.
- Cutting hard materials.
- Improper cleaning.
- Corrosion or rust.
- Dishwasher damage.
- Poor storage practices.
Even premium stainless steel kitchen shears eventually require sharpening as part of normal maintenance.
Common Causes of Premature Dulling
Many users unintentionally shorten the lifespan of their kitchen shears by using them for tasks they were never designed to perform.
Examples include:
- Cutting cardboard.
- Opening heavy plastic straps.
- Cutting wire.
- Cutting metal packaging clips.
- Using shears as utility scissors.
These activities place excessive stress on the blade edges and can cause both dulling and blade damage.

Signs Your Kitchen Shears Need Sharpening
Many people continue using dull kitchen shears without realizing how much performance has been lost.
Recognizing the warning signs early can help maintain efficiency and prevent frustration during food preparation.
1. Increased Cutting Effort
If you find yourself applying significantly more force than usual, your kitchen shears may have lost their edge.
2. Tearing Instead of Cutting
Sharp blades create clean cuts. Dull blades often tear herbs, poultry skin, and packaging rather than slicing through them smoothly.
3. Slipping on Food Surfaces
When blades struggle to grip ingredients, they may slide rather than cut, increasing the risk of accidents.
4. Uneven Cutting Performance
If certain areas of the blade cut better than others, localized wear may have developed along the cutting edge.
5. Visible Edge Damage
Small chips, flat spots, or shiny worn areas on the blade edge often indicate that sharpening is needed.
6. Hand Fatigue During Use
One of the earliest signs of dull shears is increased hand and wrist fatigue caused by excessive cutting resistance.
Can Kitchen Shears Be Sharpened?
Yes. Most quality kitchen shears can be sharpened multiple times throughout their lifespan.
In fact, many professional-grade kitchen shears are specifically designed for long-term maintenance and repeated sharpening.
Whether your shears feature straight blades, micro-serrated edges, or detachable construction, there are sharpening methods available to restore performance.
However, sharpening success depends on several factors:
- Blade material.
- Blade geometry.
- Shear quality.
- Existing blade damage.
- Sharpening technique.
Detachable Kitchen Shears Are Easier to Sharpen
Many modern kitchen shears feature detachable blade designs.
These models allow the blades to separate completely, providing easier access during sharpening and cleaning.
Advantages include:
- Improved sharpening accuracy.
- Easier blade inspection.
- Better hygiene.
- More thorough cleaning.
- Safer maintenance.
This is one reason detachable kitchen shears have become increasingly popular among professional chefs and commercial kitchens.
Tools Used to Sharpen Kitchen Shears
There are several effective ways to sharpen kitchen shears depending on your skill level and available equipment.
The most common sharpening tools include:
| Tool | Difficulty | Effectiveness |
|---|---|---|
| Sharpening Stone | Advanced | Excellent |
| Scissor Sharpener | Easy | Very Good |
| Sandpaper | Moderate | Good |
| Diamond Rod | Moderate | Very Good |
| Aluminum Foil | Easy | Temporary |
Each method offers unique advantages depending on the condition of the blades and the desired level of sharpening.
In the next section, we'll walk through four proven methods for sharpening kitchen shears at home, including step-by-step instructions and professional tips.
Method 1: Sharpening Kitchen Shears with a Whetstone
Using a whetstone (sharpening stone) is widely considered the most effective method for restoring kitchen shears to a razor-sharp edge.
This technique removes damaged metal, rebuilds the cutting bevel, and produces the longest-lasting edge.
What You'll Need
- 1000-3000 grit whetstone.
- Clean towel.
- Water (for water stones).
- Detachable kitchen shears (recommended).
Step 1: Disassemble the Shears
If your kitchen shears feature a detachable design, separate the blades before sharpening.
This allows better access to the cutting edge and improves sharpening accuracy.
Step 2: Identify the Bevel Angle
Most kitchen shears have a factory bevel angle between 20 and 30 degrees.
Maintaining the original angle is essential for achieving optimal cutting performance.
Step 3: Sharpen Along the Existing Bevel
Place the beveled side flat against the whetstone and move the blade across the stone while maintaining the factory angle.
Use smooth, consistent strokes from heel to tip.
Repeat approximately 10-20 passes depending on blade condition.
Step 4: Remove the Burr
After sharpening, a small burr may form on the opposite side of the blade.
Gently remove it with a few light passes on the flat side.
Step 5: Reassemble and Test
Reassemble the shears and test them on paper or herbs.
Properly sharpened kitchen shears should cut smoothly without tearing.
Method 2: Using a Scissor Sharpener
For most home users, a dedicated scissor sharpener offers the easiest and safest sharpening solution.
Modern sharpeners are specifically designed to maintain proper blade angles while minimizing user error.
Advantages
- Fast.
- Easy to use.
- Consistent results.
- Beginner-friendly.
- Low risk of blade damage.
How to Use a Scissor Sharpener
- Open the kitchen shears.
- Place one blade into the sharpening slot.
- Pull smoothly through the sharpener.
- Repeat 5-10 times.
- Sharpen the second blade if required.
- Wipe away metal filings.
This method works particularly well for lightly worn kitchen shears that require routine maintenance rather than complete edge restoration.
Method 3: Sharpening Kitchen Shears with Sandpaper
Sandpaper provides an inexpensive alternative when sharpening equipment is unavailable.
Although not as effective as a whetstone, it can significantly improve cutting performance.
Recommended Grit
- 150 grit for heavily worn blades.
- 400 grit for general sharpening.
- 800 grit for finishing.
Step-by-Step Process
- Fold sandpaper with abrasive sides outward.
- Cut through the sandpaper repeatedly.
- Make 20-30 full cuts.
- Wipe the blades clean.
- Test cutting performance.
This technique removes minor edge wear and helps refresh dull blades.
However, it should not replace proper sharpening for severely worn kitchen shears.
Method 4: Using Aluminum Foil (Emergency Method)
The aluminum foil method is one of the most commonly discussed kitchen hacks for restoring cutting performance.
While it cannot truly sharpen a severely dull blade, it can help realign microscopic edge irregularities and temporarily improve cutting efficiency.
How to Use the Aluminum Foil Method
- Fold aluminum foil several times.
- Create a thick multi-layer strip.
- Cut through the foil 20-30 times.
- Wipe blades clean afterward.
When to Use This Method
This technique works best as a temporary maintenance solution between full sharpenings.
It is particularly useful when kitchen shears have become slightly dull but do not yet require major edge restoration.
Professional Sharpening Tips
Professional chefs and sharpening specialists follow several best practices to maximize edge quality and blade lifespan.
Maintain the Original Angle
Changing the factory bevel angle can negatively affect cutting performance and blade durability.
Sharpen Both Blades Evenly
Uneven sharpening can create poor blade alignment and inconsistent cutting action.
Avoid Excessive Metal Removal
Only remove enough material to restore the cutting edge. Over-sharpening shortens blade lifespan.
Inspect the Pivot Joint
Sometimes poor cutting performance is caused by a loose pivot screw rather than a dull blade.
Always check blade alignment before sharpening.
Use Food-Safe Lubrication
After sharpening, apply a small amount of food-safe lubricant to the pivot area for smoother operation.
How Often Should Kitchen Shears Be Sharpened?
Sharpening frequency depends on usage volume, blade material, and maintenance practices.
| Usage Level | Recommended Sharpening |
|---|---|
| Occasional Home Use | Once per year |
| Regular Home Use | Every 6-12 months |
| Heavy Home Use | Every 3-6 months |
| Commercial Kitchens | Monthly inspection |
Routine maintenance and proper cleaning can significantly extend the time between sharpening sessions.
``` ```htmlCommon Kitchen Shears Sharpening Mistakes
Many people accidentally damage their kitchen shears while attempting to sharpen them. Avoiding these common mistakes will help preserve blade life and maintain optimal cutting performance.
Using the Wrong Sharpening Angle
One of the most common mistakes is changing the factory bevel angle. Kitchen shears are engineered with a specific edge geometry, and altering that angle can reduce cutting efficiency.
Sharpening the Flat Side Excessively
Most kitchen shears are sharpened primarily on the beveled side. Excessive grinding on the flat side can damage blade alignment and reduce cutting quality.
Ignoring Blade Alignment
Sometimes poor cutting performance is caused by loose pivot screws rather than dull edges. Always inspect alignment before sharpening.
Using Power Tools Improperly
High-speed grinders can overheat the blade edge, affecting steel hardness and shortening the life of the shears.
Skipping Cleaning After Sharpening
Metal filings left on the blades can contaminate food. Always clean and dry kitchen shears thoroughly after sharpening.
How to Keep Kitchen Shears Sharp Longer
Proper maintenance can dramatically reduce sharpening frequency and extend the lifespan of your kitchen shears.
Clean Immediately After Use
Food residue, moisture, and acidic ingredients can accelerate corrosion and edge wear.
Hand Wash Whenever Possible
Although some kitchen shears are dishwasher safe, repeated dishwasher cycles may dull the blades faster than hand washing.
Dry Completely
Water left around the pivot joint can contribute to corrosion and reduce smooth blade movement.
Use Shears Only for Intended Tasks
Kitchen shears are designed for food preparation. Avoid cutting hard materials such as wire, cardboard, plastic straps, or metal clips.
Store Properly
Store kitchen shears in a dry location where the blades are protected from contact with other metal utensils.
Kitchen Shears vs Kitchen Knives: Which Requires More Maintenance?
Both kitchen knives and kitchen shears require regular care, but their maintenance needs differ slightly.
| Maintenance Factor | Kitchen Shears | Kitchen Knives |
|---|---|---|
| Cleaning Complexity | Higher | Moderate |
| Sharpening Frequency | Moderate | Higher |
| Corrosion Risk | Moderate | Moderate |
| Pivot Maintenance | Required | Not Applicable |
If maintained properly, both tools can provide years of reliable service in home and commercial kitchens.
Frequently Asked Questions
Can kitchen shears really be sharpened?
Yes. Most quality kitchen shears can be sharpened multiple times throughout their lifespan.
What is the best way to sharpen kitchen shears?
A whetstone provides the most precise and durable edge, while dedicated scissor sharpeners offer the easiest solution for most users.
How often should kitchen shears be sharpened?
For regular home use, sharpening every 6–12 months is usually sufficient.
Can aluminum foil sharpen kitchen shears?
Aluminum foil can help improve cutting performance temporarily, but it does not replace proper sharpening.
Can serrated kitchen shears be sharpened?
Yes, but serrated blades require specialized sharpening tools and techniques.
Should I sharpen both blades?
Yes. Maintaining balanced blade geometry helps ensure smooth and consistent cutting.
Why do my kitchen shears still cut poorly after sharpening?
Possible causes include poor blade alignment, loose pivot screws, damaged edges, or improper sharpening angles.
Can kitchen shears go in the dishwasher?
Many models can, but hand washing is generally recommended for maximum longevity.
How long do quality kitchen shears last?
Professional-grade kitchen shears can last many years or even decades with proper care and maintenance.
When should kitchen shears be replaced instead of sharpened?
Replacement may be necessary if the blades are severely chipped, cracked, bent, or worn beyond safe restoration.
Related Resources
OEM Kitchen Shears Manufacturing by FASAKA
FASAKA specializes in manufacturing high-quality kitchen shears, poultry shears, multi-purpose kitchen scissors, and professional cutting tools for global brands, wholesalers, retailers, and distributors.
Our OEM and ODM services include:
- Custom kitchen shears design.
- Private label manufacturing.
- Logo customization.
- Retail packaging solutions.
- Wholesale production.
- Global export support.
Whether you are launching a new kitchenware brand or expanding an existing product line, FASAKA can help bring your ideas to market efficiently and professionally.
👉 Learn More About OEM & ODM Services
👉 Browse Kitchen Scissors Products
Final Thoughts
Learning how to sharpen kitchen shears is an essential skill for anyone who cooks regularly. Proper sharpening restores cutting performance, improves safety, reduces effort, and extends the lifespan of your kitchen tools.
Whether you use a whetstone, a dedicated scissor sharpener, sandpaper, or a temporary aluminum foil method, maintaining a sharp edge helps your kitchen shears perform at their best.
Combined with proper cleaning, storage, and routine maintenance, quality kitchen shears can provide reliable performance for many years in both home and professional kitchens.
Need Professional Kitchen Shears for Your Brand?
FASAKA offers OEM and ODM manufacturing services for kitchen shears, poultry shears, and professional kitchen scissors with customized designs, packaging, and branding.